People would make Jack-O’-Lanterns out of pumpkins and place them at the front of the houses. This tradition originated in Ireland when they would carve scary faces into pumpkins in order to scare evil spirits. It was believed that from the evening of Oct. 31, till the morning of Nov. 1, souls of those who had passed on that year would wander. The evil spirits needed to be scared away from entering their homes.
According to America Comes Alive, it is said that “These carved vegetables were eventually called Jack O’ Lanterns by the Irish who told a legend about a farmer named Jack who made a bargain with the devil that left him wandering the earth for all time.”
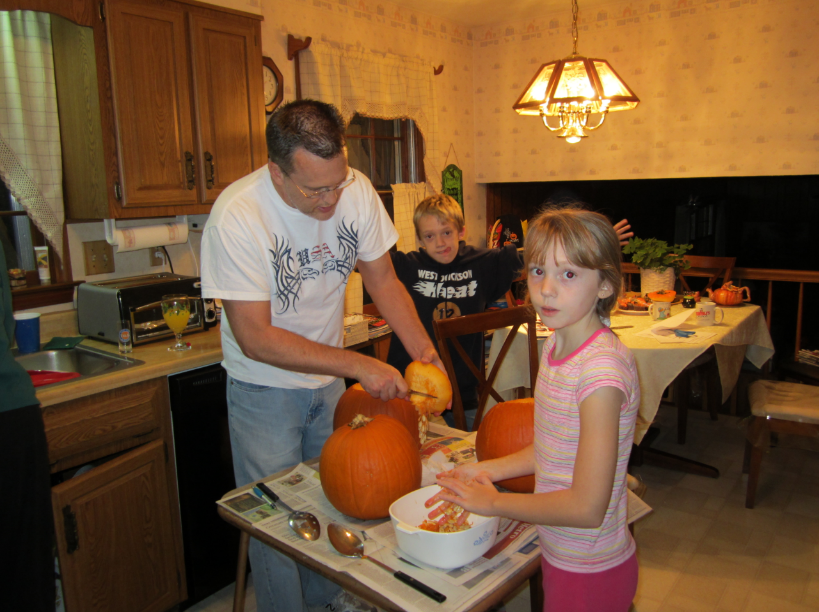
Fall Pumpkin by Emma Keisler
Over time Jack-O’-Lanterns have become an essential Halloween decoration. However, carving a face into a pumpkin is not as easy as it sounds.
UNG Student, Liam Dreesen said “It’s a good group activity surrounding Halloween, something fun to do with family and friends. Not only do people carve scary faces into pumpkins, there are other creative designs that people have done. Some of which include carvings of cartoon characters, animals, silly or happy faces, or just painting the pumpkins instead.
“We would always compete with each other to see who could come up with the best design. My pumpkin is the cat! I definitely have fond memories of carving pumpkins with my brothers. I didn’t like having to handle the pumpkin guts, but I definitely loved making designs…and competing with my brothers, of course.” -Rachel Sapecky
Bat, cat, and Angry bird pumpkin design By Rachel Sapecky
Many people limit the artistic vision of what they want to create due to not being able to handle the pumpkin and get it to do what they want to do. Here are some step-by-step in creating a basic Jack-O’-Lanterns.
Before getting started, it is important that the right equipment is used so that it turns out well. The supplies you will need include: a pumpkin of any size, Sharpie or permanent marker, LED candles, scraper, serrated knife, kitchen knife, and waste bag. An easier option is to get a pumpkin carving kit.
How to (tips & tricks):
Use the sharpie/ permanent marker to draw a design on the pumpkin (eyes, nose, mouth, etc.) of any size. Just remember that the bigger it is, the easier it is to cut.
Draw a circle around the stem on top of the pumpkin. This would be the lid.
Now you’re ready to cut. Cut only the circle created around the stem. Using the serrated knife, do a 45-degree inward angle as you cut around the outlines previously made with the sharpie/ permanent marker.
Using your scraper, pull out all the seeds from the circle on top of your pumpkin and put them in a bowl. Go ahead and clean the insides of the pumpkin, removing any strings and bits.
You may now cut the outline of your designs on the pumpkin!
Your donation will support the student journalists of University of North Georgia. Your contribution will allow us to purchase equipment and cover our annual website hosting costs.
Hi! My name is Maria and I’m from UNG’s Gainesville campus. My major is Communications with the concentration of Multimedia Journalism. I enjoy writing for Vanguard because as an aspiring journalist, it allows me to connect with people, hear their stories, and know whats going on around me. I want to be able to bring awareness with any platform I’m given. I can’t wait to see what amazing stories come up.